Studio holds the prices used to calculate trips. Start with one default plan: your standard prices when no customer-specific plan applies. Add client plans only where you have different agreed prices.
Before you start
- Finish the tenant, company, office, and vehicle-type setup in Back Office.
- Have access to Studio for the same tenant and permission to edit pricing.
- Prepare your actual rates, minimum charges, fees, and cancellation terms. The wizard’s example amounts are not your agreed prices.
- Use a tablet or computer if you need Zone Explorer.
Saving active pricing can affect new quotes immediately. Studio uses active/inactive controls and active dates; there is no separate Publish step. Complete setup and quote checks before accepting bookings for a new tenant. For changes to an operating tenant, agree a change window and record the current prices first, then repeat the Quote Calculator checks after saving.
1. Check the tenant and shared setup
Sign in to Studio and check the organization name in the sidebar. It must be the tenant you are setting up.
Open Pricing → Settings → Offices and confirm your office is listed with the correct address, active state, and coordinates where needed. Offices are edited in Back Office and synchronize into Studio every few minutes.
Open Pricing → Settings → Vehicles and check that the expected active vehicle types appear. This screen sets optional multipliers for filling prices; it does not add fleet vehicles. Changing a multiplier does not recalculate rates you already saved.
2. Create your default prices
Open Pricing → Overview. The page heading is Your Pricing.
- Select Set up your pricing. If a default plan already exists, select Open Plan and review its Base Fares instead.
- Choose your main pricing model and select Next.
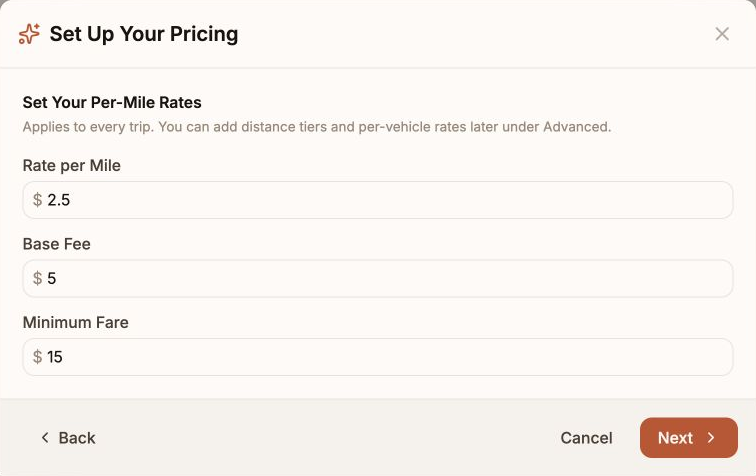
- Enter your own values using the table below, then select Next.
- Under Add Standard Taxes & Fees, enable Sales Tax or Gratuity only if needed. Sales Tax requires a positive percentage. Gratuity lets the customer choose or adjust the tip at checkout.
- Review your entries. Select Go Live for Per-Mile or Hourly, or Create Plan for Zone-to-Zone.
| Model | What to enter | What is still needed |
|---|---|---|
| Per-Mile | Rate per Mile, Base Fee, Minimum Fare | Review vehicle-specific prices if your vehicle types cost different amounts. |
| Hourly | Rate per Hour, Minimum Hours | Add a per-mile or zone fare too if you offer point-to-point trips. |
| Zone-to-Zone | The wizard creates the default plan; prices are entered afterward. | Complete step 3. Creating the plan alone does not create a zone fare. |
Per-Mile and Hourly create an active standard rate. Later, open the plan’s Base Fares tab to add or adjust distance and hourly rates for each vehicle type.
3. Add zones and fixed fares, if needed
Skip this step if your prices do not depend on named areas.
- Open Zones → Explorer. Search for the airport, city, or ZIP area you need. Selecting an unsaved search result saves that zone; check that it appears in your saved zones.
- Review the geography on the map. A zone describes an area; saving it does not give it a price.
- Return to Pricing → Rate Plans, open your default plan, and choose Base Fares.
- In Zone Based Rates, select List → Add zone rate. Give it a recognizable name, choose Between zones, and select the From and To zones.
- Choose Flat fare. Under Prices by vehicle, include the vehicle types you offer and enter each fare.
- Add Conditions only if the fare is limited to certain days, times, dates, or vehicle types. Check the Active selection and select Save rate.
A From/To fare is directional. Add the reverse route if you offer it, and test both directions. Include rates for trips outside your fixed routes if your business offers those trips too.
4. Review fees and cancellation terms
Open the plan’s Fees & Surcharges tab. Confirm any tax or gratuity from setup is present, then configure the other charges you actually use. Check amounts, when each charge applies, and whether it is optional.
Review the Cancellation tab against your cancellation and no-show terms. Review the plan’s Active window and Restrictions as well: correct prices will not help if the plan excludes the date, service, or vehicle being booked. Plan settings save immediately.
5. Add client pricing, if needed
Skip this step if all customers use your standard prices.
- Open Pricing → Rate Plans → Create a plan for a client.
- Enter a Plan Name and choose the existing plan it should start from, usually your default plan.
- Choose the same prices, a discount, a markup, or Only routes I price here. Enter any percentage and review whether to inherit the parent’s fees and taxes.
- Review the summary and select Create Plan. New client plans are active on creation; complete their rates before assigning them to customers.
- Create the plan now, then assign it when you reach Account setup and Individual setup. Naming a plan after a client does not assign it to that client.
Only routes I price here blocks trips without a matching price on that plan. A percentage discount or markup applies to inherited base fares; inspect fees separately.
6. Check it worked
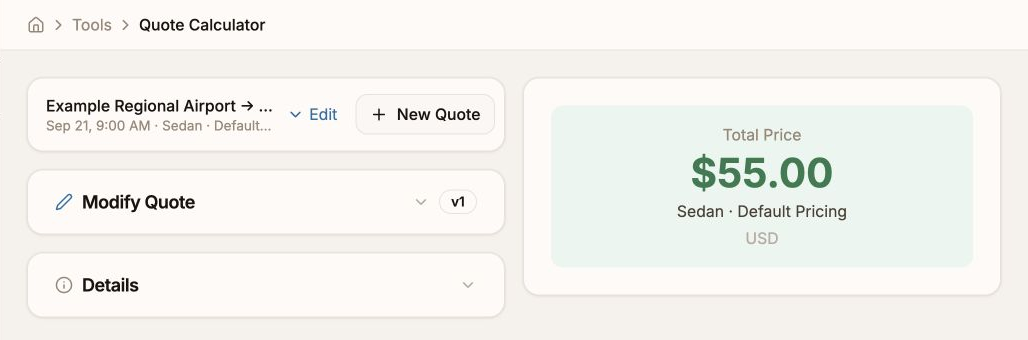
Open Tools → Quote Calculator. Choose pickup and dropoff locations from the address results, enter the Pickup date/time, select Service and Vehicle, and enter Hours for an hourly trip. Select Calculate Quote and compare the fare, fees, total, and currency with your expected result.
New calculations use the company’s configured currency. If Studio cannot determine it, resolve the reported problem before retrying; changing a rate amount does not fix the currency. Older saved quotes keep their recorded currency.
Before moving to Account setup, confirm these:
- Your intended default plan is marked Default and its state is Live for immediate use.
- Every vehicle and service you offer returns the expected price and company currency.
- Fixed routes work in both directions where offered; locations near zone edges behave as expected.
- Minimum charges and any time-based fees work at their boundaries.
After creating accounts and individuals in the next steps, finish the client and Back Office checks in Your first booking. Confirm that a client example selects the intended plan and agreed price, and that a booking with the intended passenger, booker, and account produces the expected result.
In the calculator’s Advanced Options, select one Account to check account pricing and review the displayed Rate Plan. The calculator models the account, while Back Office can resolve a passenger’s plan before the booker’s plan, then the account’s plan. This is why the final Back Office check matters.
Quote Calculator does not provide a verified preview of inactive plans or paused rules. Do not treat a successful quote as a test of a rule that is not active.
Common blockers
- Studio is still setting up the workspace: allow the setup check to finish. For Unable to connect, check your connection and select Retry. Contact Support if setup remains stuck.
- A vehicle type or office is missing: check the same tenant and the record in Back Office. Allow office synchronization to finish and reload Studio.
- The setup button is missing: a default plan already exists. Open it and review its Base Fares.
- The plan exists but there is no price: check active state, dates, restrictions, the selected vehicle/service, and whether the required fare was actually saved. A Zone-to-Zone plan needs zone rates after creation.
- A client gets the standard price: check the saved rate-plan assignment in Back Office and the passenger/booker records used by that booking.
- The total is wrong: inspect the applied fare and each fee before changing more settings. Keep the trip inputs and expected total so Support can repeat the example.